Monthly Archives: May 2006

Another new dress!

While going through my stash the other day I found a treasure:

These are beautiful, high-quality rayons from Doncaster. A few years ago, I was teaching a week-long fitting workshop at Bernina Says Sew in the Charlotte, NC area with my former teaching partner and friend, Emma Seabrooke. The manager of the shop raved about the Tanner Outlet in Rutherfordton so, naturally, we had to go there. We were so anxious to get there that we ate fast food (I never eat fast food) in the car instead of stopping for lunch! Aside from Doncaster clothing, jewelry and accessories, the shop also sold past-season fabric ends. The fabrics were exquisite and we ended up buying quite a lot.

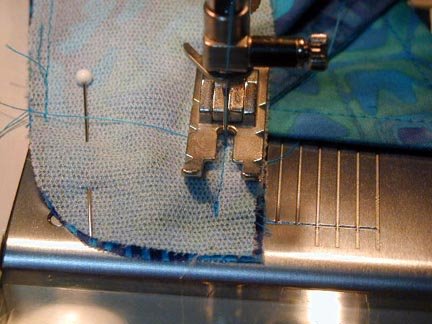
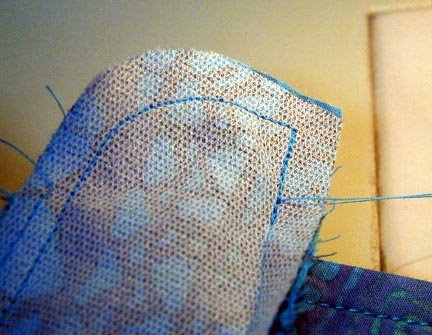
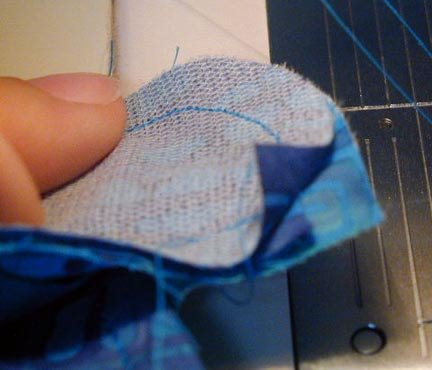
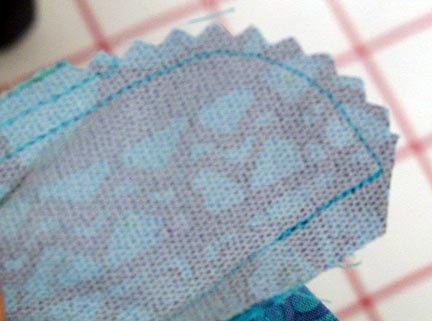
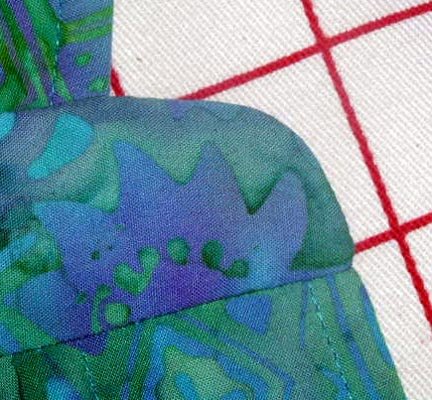
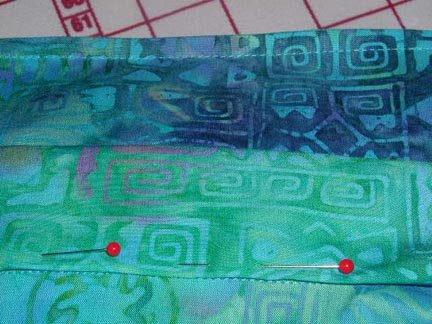
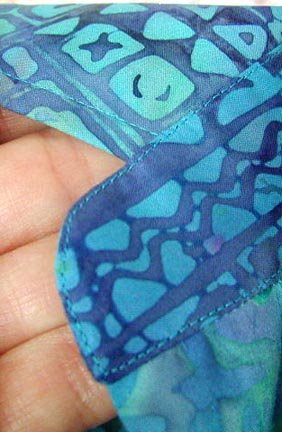
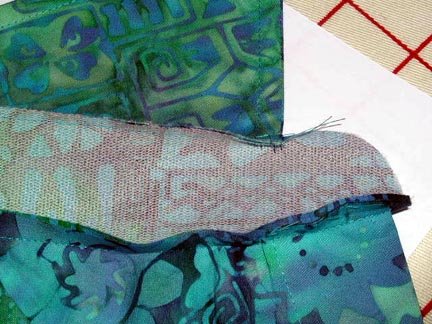
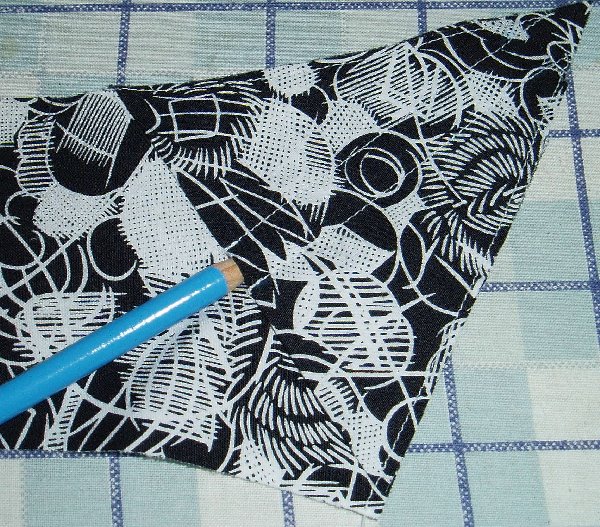
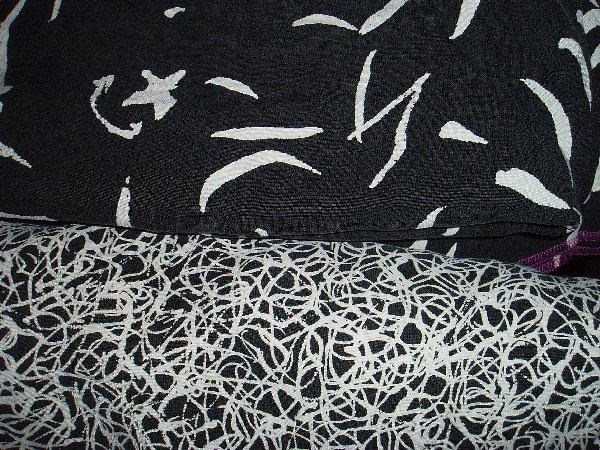
So, these two fabrics will become another McCall’s 5137. I will be using the small print for the neck band and for narrow piping at the waist and hem band. I will use the large print for the main sections – I didn’t want it to be too busy. The fabric has a heavy drape and is thick enough that I can probably get away without a slip – always a bonus in my humid climate.

7 Comments

Filed under Fabric, McCall's

Collar on stand – Part 2

Today we are going to finish up the band. Pin the outer band onto the inner band, right sides together. As you can see in the photograph, I have carefully tucked the front edge of the shirt up into the bands. This will allow me to stitch around for a nice neat front edge. I’m normally not big on pinning but, in this case, it helps to keep the layers in position.

Here is where your accuracy in attaching the inner band will pay off. I begin my stitching about 3/4″ in from the front edge (or as much as the fabric will allow – sometimes more, sometimes a little less) and pivot exactly where my previous stitching ends.

Always check to make sure you haven’t accidentally caught anything you shouldn’t have in your stitching before trimming.

I simply cut across the corner and then trim the curve with pinking shears. When using 1/4″ seam allowances, it isn’t necessary to do any additional trimming.

The front edge is nice and neat from the outside.

And from the inside.

The last step is to edge stitch around the band, closing up the remaining neck edge at the same time.

That’s it! This entire process, with practice, should take you no more than a few minutes and will give you a great result every time. I hope you’ll give it a try.

3 Comments

Filed under Tutorials

Collar on Stand – Part 1

I published this tutorial on my GigiSews.com site a few years ago and thought that perhaps it was time to revisit the collar on stand. So many sewers seem to have trouble with this (especially the stand/band) but it’s actually quite easy. I recommend you use 1/4″ seam allowances in the collar, stand and neck edge of the garment. You can use 3/8″ but I find 1/4″ so easy to sew with a patchwork or 1/4″ foot. The main thing is NOT to use 5/8″ seam allowances. If you are new to shirtmaking, I really recommend that you try a Kwik-Sew pattern to start. Kwik-Sew always includes separate under- and upper-collar pieces so that you can educate yourself on the differences between the two. This will make it easier to modify patterns that only include one collar pattern piece later on. I will show you my super-easy cheater method next week!

Interfacing: I like to use fusible interfacing on both collar and stand pieces. My favorite interfacing is Palmer/Pletsch Sheer. It is lightweight yet crisp and bonds extremely well. If you are making a dress shirt and desire a very stiff collar you may want to use something like ShirTailor. I’m not fond of an overly stiff collar and prefer to use collar stays instead. This is a matter of personal preference.

Collar construction: Complete the collar. Go ahead and topstitch the edges and baste the neck edges together at 1/8″ (you don’t want to have to remove any visible stitching later).

Step 1 The first step is to attach the inner band to the garment using (in this case) a 1/4″ seam allowance.

Notice that I have stopped and started exactly at the shirt front edge – this is
imperative. Do not stop one stitch short or sew one stitch too many as this will be your pivot point when attaching the outer band. It is more important to stop exactly at the front edge than it is to have an exact 1/4″ seam allowance.

Step 2: Attach the completed collar to the inner band using an 1/8″ seam. Again, you’ll want to use the 1/8″ seam to avoid having to remove any stitching later. Use a regular stitch length to hold the collar securely. Note that the upper collar will be against the inner band.

Tune in tomorrow for more!

4 Comments

Filed under Tutorials

Dresses!

Aside from Simplicity/New Look, I rarely look at The Big-4 (or Big-2, whatever you prefer) patterns anymore. However, when Erin over at Dress A Day posted this pattern last week I couldn’t resist buying it.

It’s eerily similar to a vintage Vogue Nina Ricci pattern I bought last week. Which, BTW, I see Erin bought as well! A pretty dress is a pretty dress.

My one concern is that the gathering below the midriff band will be too much for me. I’m not small-waisted so I may have to reduce the fullness a bit. I have quite a few nice rayons and silks in my stash so I’m thinking of making the McCall’s (the Vogue pattern hasn’t arrived yet) dress to wear to a brunch on Sunday. I think the secret to this style is using very drapey and light-weight fabric. I like the tie because it will make the dress somewhat adjustable through my weight-loss journey.

4 Comments

Filed under McCall's, Patterns, vintage

A Sewing Treasure

Last week I noticed this book for sale on Ebay. The seller had posted beautiful photos of the inside of the book (like the one shown below), several of which caught my eye. As is my luck, it caught the eye of a few other bidders as well.

Before I bid on Ebay books I always hop over to Amazon.com first. Often I will find the same book for less as I did here. This book, as you can see, is titled clothing construction. The authors are Evelyn Mansfield (formerly of Michigan State) and Ethel Lucas (of Framingham State).

I don’t often get overly excited about sewing books but this little gem is truly a treasure trove of techniques. Loaded – and I mean loaded – with photographs, clothing construction covers a lot of ground. For example, Chapter 1 covers sewing equipment and setting up a work space. Chapter 2 contains lovely photographs of various machine and hand stitches. Chapter 3 goes into pattern selection, general fitting principles and fitting a pattern – including tissue fitting. Would you like to know how to sew a padded slot seam? Or maybe you’d like to make curved tucks on a collar. How about covering weights to control the drape of a cowl neck? It’s all in there! There are seventeen chapters over nearly 400 pages with photos too numerous to count. This is truly a wonderful addition to the library of any sewing fanatic, beginner or advanced. I notice there are still four copies available at Amazon….

UPDATE: I take that back – there are no more copies left! Wow, you guys are quick.

Clothing Construction, 2nd edition
(c) 1974 Houghton Mifflin Company
ISBN 0-395-16728-0

10 Comments

Filed under Books

Dress rehearsal

Please excuse my Mountain Man – he’s refused to shave, cut his hair (or wash his uniform) until baseball season was over. I’m not 100% happy with the sleeves. I suspected as much going in – I even made sure I’d have enough for a recut. My son has not been home much and by the time I decided they needed recutting it was too late. You can see that the sleeve cap needs more height so I’ll make that change next time. But, bless him, he thinks the shirt is perfect just as it is.

The fabric is a wonderful, silky cotton with just a touch of lycra. It is from Ascher Studios and was a pleasure to work with. Year before last, Fashion Fabrics Club had many gorgeous prints from Ascher at an irresistible price so, naturally, I bought all of the ones that appealed to me. Top-quality cottons are not always easy to come by!

4 Comments

Filed under Fabric, Patterns, vintage

Finished collar


You can see how the collar stays and additional fabric in the undercollar points (from the patch described below) give a nice appearance to the collar – no more curling collar tips! I’m pleased with the way this turned out. I used Palmer/Pletsch Sheer interfacing on both collars and bands. The end result is crisp without being boardy. I’ve had excellent results with this interfacing over the years. I only wish it were available by the bolt.

2 Comments

Filed under Fabric, Patterns, vintage, Tutorials

Collar stays

My vintage pattern calls for buttonholes in the under collar to accommodate the collar stays. I really don’t like that idea. Instead I like to use what I refer to as the patch method. It is neat, easy and adds more body and weight to the points of the collar – especially helpful in a large collar such as this. What I do is fold a piece of the fashion fabric in half on grain. I then place it across the under collar with the fold at the stay opening, trimming away any excess around the collar. To reduce some of the bulk in the very tip of the point I trim about 3/4″ across the point from the underlayer only. Do not trim anything from the upper layer. If you do, it will show later. After stitching the channels for the stays, the under collar is ready to be sewn to the upper collar.

1 Comment

Filed under Fabric, Patterns, vintage, Tutorials

Neck Sizes


When I taught shirt-making I was often asked how to change the neck size of a pattern – usually how to increase the size. We are so used to simply adding on to a pattern in order to grade it up yet that is exactly the opposite of what must be done to increase the neck size. If you were to simply add on to the neck edge it would become smaller as you can see from the pattern here. In order to increase the neck size you must make the opening larger by removing material. Little or nothing is removed at the back neck edge as neck size does not increase in that area. Of course, the easiest thing to do is buy a pattern that has cutting lines for various neck sizes like Kwik-Sew 2777 that is shown here. However, that doesn’t always fit in with our plans, does it? If you make a lot of shirts you can cheat a bit by making templates from a pattern such as this. It works and it’s easy to do.

Once you’ve made the neck opening larger you will need to increase the length of the stand and collar. I like to walk the neck edge along the stand to see how much extra length I’ll need. On my son’s shirt I needed an extra 2″ so I slashed the stand in four places and added 1/2″ at each slash. I knew I’d need 2″ in the collar as well but I walked the collar along the stand just to be sure. A typical shirt collar runs from center front to center front but you’ll want to check your pattern in case it’s different from the norm.

Comments Off on Neck Sizes

Filed under Alterations, Fabric, Patterns, vintage, Tutorials

My Son’s Prom Shirt


My son wants a 1970s-style shirt to wear to the prom. I found a couple of vintage patterns on Ebay. The one pictured here is the one we’ve decided to use as we both like the lines and fit. Unfortunately, it isn’t his size – he’s a 38 with a 16 1/2 neck – so I’m grading it up. I’ve done the tissue-fitting and am taking time off today to make the alterations and cut a quick muslin. He will be home from practice around 7:00 tonight so hopefully I can cut the shirt out tonight and sew it up tomorrow. Prom is on Saturday night and he has a game on Friday night – oh, and then there’s WORK – so I don’t have much free time. But I’m not worried. Once I have the fit down, it’ll only take a couple of hours to make the shirt. Groovy, huh?

2 Comments

Filed under Patterns, vintage