
I stayed up last night and finished the hems and lining, bring on the cold front!

I stayed up last night and finished the hems and lining, bring on the cold front!
Filed under Year of the Jacket
It’s been in the mid-80s for a number of days so I haven’t felt like working on the jacket as much. But, now that I’m in the home stretch I am anxious to get it finished. We have a cold front coming through mid-week so maybe I’ll even get to wear it! I swear, my garden doesn’t know if it’s winter or spring these days. My trees are dropping their leaves and blooming at the same, sigh.
The last bit of inner construction to be finished before putting in the lining are the fur hooks. I used an awl to make a hole large enough for the hook to pass through (If you are using fur with a knit backing you could make a small snip) and then stitched it on securely from the inside.


From the outside, all you see is the hook portion.

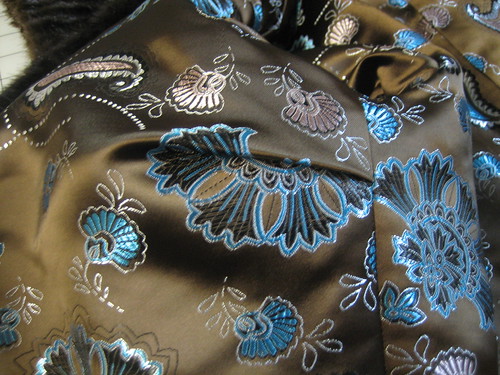
The lining has been assembled and attached except for the hems. This rayon brocade practically screamed my name when I stopped into JoAnn’s for a thimble (yes, I broke down and bought one). I rarely bother to look at their fabric but there it was, right on the aisle in one of my very favorite color combinations.

Rather than sewing the bust dart in the lining, I opted to simply fold it. I saw it done this way in a ready-made fur coat and thought it not only looked nice but provided a bit of wearing ease as well.
Another detail that I copied from a ready-made jacket (in this case my Persian lamb) is a pleated piping along the back neck edge. I am assuming that this piping served to protect the fur from soil and wear. I think it’s a pretty and luxurious detail, don’t you?

Once I finish up the hems, I think I’d like to work on a couple of quick and easy projects before moving on to my next jacket. A palate cleanser of sorts!
Filed under Year of the Jacket
I was finally able to get back to the jacket today, yay! I stitched the darts, shoulder and side seams and attached the collar. Because the fur is so plush I had to trim it out of the seam allowances (best done over a wastebasket!). To keep the seam allowances flat, I catchstitched them to the backing. I did the same with the darts after slashing them open.


One of my favorite parts, the back of the collar.

All I have left now are the sleeves, hems and lining. Not too much but everything does take a little longer in fur. I hope we have a few more cold days so I can wear this at least once. Speaking of cold days, I am shocked at how much I am wearing my fur vest! It turns out to be the perfect thing to throw on when it’s just a little chilly. I think I need another one (just an excuse to sew with fur again).
Filed under Year of the Jacket
Since I had some uninterrupted time this morning I decided to put the pockets in. Cutting into your jacket fronts is always scary (especially in a pricey fabric) and I wanted to make sure I had a clear head.
First, I marked the pocket opening on both fronts, making sure they were identical. My hands are small so I made my opening 5.5″ long. I determined a comfortable placement during a try-on.

The next step was to stay the opening. To reduce bulk I used silk organza selvedges left over from another project. Twill tape would be fine too but it is a little more bulky. The stay is attached at the finished edge with tiny fell stitches and then a diagonal basting stitch is used to attach the remainder to the backing (running basting stitch would be fine as well). I taped across the top and bottom of the opening,

and then down each side. Notice that I left a hairline space between the two so that I don’t cut the stay or the stitching later.

Now for the scary part, carefully cutting the slash!

I am using 2″ wide strips of Ultrasuede (gotta love that Ultrasuede stash!) to face the slash. You could also use petersham, real leather/suede, even grosgrain ribbon would be okay (albeit a bit stiff). I cut my strips extra long so that I didn’t have to fuss over the placement. Whipstitch your facing strips to the edge of the slash being sure to catch your stay in the stitching and pushing the fur out of the way with your needle. I opted to do this by hand because I have more control that way.


For extra reinforcement I then zigzagged over the edges with a short, narrow machine zigzag. I know these pockets are going to get a lot of use and I don’t want them to tear out later. Do not use a satin stitch or you will perforate your Ultrasuede/leather/suede! I used a stitch length of about 1.5 mm and a size 14 needle.

Once that’s done, you can turn your facing strips to the inside and attach your pocket bags (I used a sturdy 3-step zigzag for this). Again, sorry for the lousy photos. I am camera-challenged since my adorable granddog chewed the screen on my good camera.


When I was examining the Persian lamb jacket, I noticed that everything inside had been tacked down, including the pocket bags. I did the same and I think it’s so much nicer than having them float around in there. The beauty of working with faux fur is that none of your stitches show on the right side.

The pocket opening is barely discernable from the right side – cool, huh?

I would like to thank the authors of this really awesome vintage Vogue booklet for teaching me this great, bulk-free method (this is similar to the method you’d use for buttonholes in fur). If you are interested in sewing fur you really need a copy of this book! It’s small and thin (less than 50 pages) but loaded with great information that is still relevant 40 years after it’s publication date.

Filed under Year of the Jacket
After much deliberation, I decided to cut the collar on the bias. Thank you all for your thoughtful input!

Doesn’t it look pretty from the back? (Lightened to show detail)

I cut and sewed the collar late last night and then padded it with some cotton batting I had left over from my quilt two years ago. When I took apart the Persian lamb/mink jacket on Saturday, I noticed that the collar was padded with lambswool (there is a lot more structure inside a fur coat than I expected!) so I thought I’d do the same. I kept the batting out of the seam allowances to reduce bulk and attached it with uneven and diagonal basting stitches. It seems like a lot of handwork but it really didn’t take long, maybe an hour. With all the handwork I’ve been doing lately, I am considering learning how to use a thimble!
I cut the batting out of the foldline so that the edge wouldn’t be too thick.

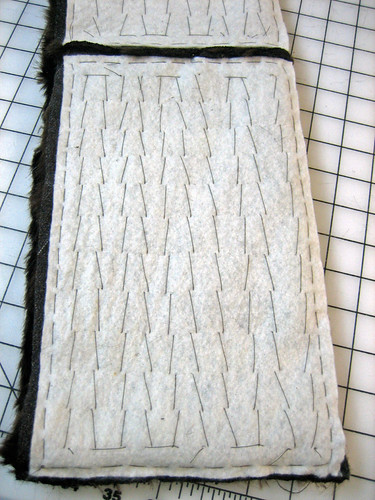
The fronts are stabilized with hair canvas and I am getting ready to stitch bits of bias-cut canvas into the hem area. The hair canvas along the facing foldline gives a nice crisp edge.

The backing of this fur is quite stable (it’s a woven) so I only taped the off-grain areas. I will also stabilize the neck edge by fusing stay tape to the lining neckline (less bulky than more twill tape).

Tomorrow, I am going to experiment with pockets as I’d like to finish them before I stitch the fronts to the back. Once they are done, everything will go together quite quickly! I was hoping to finish by the weekend but I am teaching a 2-day fitting workshop Saturday and Sunday and might be too tired to do anything more until Monday.
Filed under Year of the Jacket
I finished cutting my jacket out last night and now I’m kind of stuck on the the collar. The pattern has you cut the collar with the nap going out towards the shoulder. The more I looked at it, the more it looked like it was going to fly away! Upon examining the mink collar on my Persian lamb jacket, I noticed that it was seamed at the center back with the nap going forward. So, I cut a new collar tonight (this is why I always buy extra fabric!) and I think I like it better but, darnit, I’m not sure.
I’m going to set the collar aside for now and work on sewing in my interfacing and stay tape. That should keep me busy for tonight while I mull things over. I suppose my other option would be to recut the collar on the bias!
Original collar:

New collar:

Bias collar:

Feel free to offer opinions!
Filed under Year of the Jacket
My Tissavel faux-mink arrived from EOS today and, after a couple of pattern modifications, I’ll be ready to cut into it. I tried to photograph the fur but my pictures suck since my granddog ate my good camera. Hopefully, it’ll photograph better on the mannequin than it does laying flat on my cutting table.
I wore my faux fur vest to the movies on Saturday night and decided that I’d like the collar to be a little more exuberant. I lowered the neckline by 2″ in the front and added the necessary amount of length to the collar (which, oddly enough, was also 2″). Here is the paper pattern pinned together onto Ethel, I’m pleased. The red lines are the original cutting lines and the black ones reflect the modification.


I would really like to add some vertical pockets to this jacket so I’m working out how to do that without adding a seam. I guess I could use matching Ultrasuede and make welt pockets. I picked up a vintage Persian lamb jacket at a thrift store on Saturday and it has interesting pockets bound in petersham.

Even though I prefer faux fur I had to rescue these poor little lambs! I originally bought it so that I could recycle the fur but it actually fits me nicely and looks really cute on so I may make a new faux-fur collar for it, something a little more edgy. I don’t think I’m quite old enough to wear Persian lamb with a mink collar, maybe in 30 years!

The first thing I did was rip out the lining, padding and shoulder pads. It is amazing how most of the musty odor is in the fabric components! I put them into ZipLoc bags so that I could refer to them later when I’m relining the jacket. Check out the manufacture date on this piece, it’s in wonderful condition for it’s age. The skins are very soft and supple and there is only one small tear which will be very easy to repair.

The monogram in this jacket was exceptionally pretty. I may copy it!

Filed under Year of the Jacket
I finished putting the lining in this morning so I’ll hopefully be able to give it a test drive before the weather warms up again. I’ll let you in on a little secret: I hate working with lining fabrics, blech. But I can’t say enough good things about the coat lining I used here. It’s stretch coat lining in black from Georgeous Fabrics and was an absolute joy to work with. I really didn’t want to cut into it because I bought just enough for a short coat but I couldn’t resist so I guess I’ll be ordering some more to have on hand.

Peter had asked if the fur was messy to work with. Well, yes and no. Since I traced my pattern onto the knit backing and cut through the backing only there wasn’t much mess during cutting and sewing, just a few stray hairs. But, since this fur is pretty long, I needed to trim the excess pile out in some areas. I did trim over a wastebasket but some of the mess did get on the floor and my pressing surface, nothing major.
I really had a lot of fun working with fur and I’m happy with the way the vest turned out. But, I can tell you that I would never buy a fluffy, long-haired fur again because, frankly, it’s fattening! But, I enjoyed the process so much that I’m going to keep the pattern out and look for a nice short-haired fur for a jacket. In a short-haired fur, this pattern would go together start to finish in a matter of hours. I bought this particular fur at Fabric Depot in Portland about 15 years ago. It’s very silky-soft, I used the bulk of it to make a faux-fur throw for my in-laws a few years ago.

Filed under Year of the Jacket
Between Summerset’s adorable, casual faux fur jacket, Tany’s high-fashion jacket with removable collar and the fur vests I’ve been seeing so much of lately I’ve been having some serious faux fur envy! Alas, there isn’t anyplace locally for me to buy really nice faux fur so I had filed that idea away for later. But, last night I was cleaning my sewing room and found a large remnant of pelted faux mink that was taking up quite a bit of space and I thought, why not make a faux fur vest?
I happened to have the same pattern that Summerset used (Burda World of Fashion 12/2007 #122) and I liked the fact that it had darts so I figured I could just omit the sleeves and line the armscye to the edge. I traced off a size 36 and made a 3/4″ FBA and my usual forward-shoulder and swayback alterations. The shoulders on a 36 are usually too wide for me but on a vest that’s actually a good thing so I didn’t narrow them.

So far, I have sewn the shoulder seams and attached the collar. I cut the fronts so that the facing fold line was on a peltline, figuring it would give me a cleaner edge (which it does). If I wear this closed, the CFs will not match. But, I figured that I would never wear this closed anyway so I’d rather have a full peltline at each edge. I have never sewn with faux (or real) fur before so I’m just assuming that the CF would normally be on a peltline – am I right?

I didn’t have enough fabric for the collar so I cut the undercollar from black Ultrasuede. I had dark brown in my stash as well but the black looked much better (the flash makes the fur look lighter than it is IRL). You can faintly see the casing line for the drawstring along the top edge.

I am not planning on putting in the pockets as per the pattern. I had thought about adding in-seam pockets but I doubt I’d ever use them. If it’s cold enough for me to need to use them I wouldn’t be wearing a vest, right?
Filed under Burda WOF, Year of the Jacket
This jacket really went together very easily and quickly. If you eliminate the trim it would be an afternoon project. Here are the changes I made (or would make next time around):
*Shortened body by 2″ (not a usual adjustment for me)
*Shortened sleeves 3.5″ (I usually shorten 1″)
*Narrowed the shoulders 2″ (they were just too overwhelming on me)
*Raised the sleeve cap 1″ (it was much too flat once I narrowed the shoulder)
*If I made this again, I’d use a fitted shoulder and standard sleeve. As much as I want to like the dropped shoulder, I don’t and think a fitted shoulder would give a neater, slimmer appearance to contrast nicely with the front drape.
*Eliminated the crossover bands. They are supposed to control the drape but I’d rather train the folds (much as you would a drapery or Roman shade) than have to fuss with them. If your fabric refuses to be trained, a few well-placed, hidden stitches would do the job.

All in all, it’s a wonderful pattern to showcase a double-sided fabric or even a bulky sweater knit. I’m very happy with the embellishment. It gives me that over-the-top look that attracted me to the original jacket without being stiff or heavy. I rarely embellish anything so this was a fun departure from my usual work.
Some of you have asked about the hot-fix studs. They are 10mm silver donuts and 10mm grey squares that I purchased from Qiagraphix on Ebay. I highly recommend them! Their prices are excellent and I received my order in two days (from California, no less!). BTW, so you don’t overorder like I did, you need 84 10mm studs (placed close together) per yard, per row.
So, what’s next? Well, I’m trying to decide between the leather jacket and the navy duffle coat…
Filed under Burda Style Downloads, Year of the Jacket
