Category Archives: Sewing Studio

Burda Style 08/2010 #112

Yes, I am working on my big-bow skirt but after seeing Ann’s version of this top last week I was inspired to whip up one of my own! I used a size 34 and made adjustments for a full bust, sway back and forward shoulder.

082010112

The outer fabric is a brown rayon/poly/lycra stretch lace I had purchased from Textile Studios a few years ago. The inner fabric is a rose bamboo/lycra from Fabric Mart (it’s not as peachy as it looks in the 2nd photo). I bought several colors of this bamboo knit and just love it!

brownlace

I bound both necklines with an 1.25″ binder. Using the binder requires one shoulder to be left open and binding the neckline flat (check any of your RTW tees and you’ll see what I mean). To balance out the bulk, I left the right shoulder open on the under layer and the left shoulder open on the upper layer. Otherwise, I would have had a large lump on the left side.

brownlaceneckline

You’ll notice that I didn’t do the twisted hem. I really liked it but didn’t like it on me. So, I took in the sides, shortened both layers (the inner layer is 1″ longer) and hemmed them separately. I like it much better on me this way. Even if you don’t like this top, the neckline is fabulous and should be traced off for future use.

Fabric has been selected for the Big Bow Skirt and I was sidetracked into tracing off this peasant blouse with matching scarf from the 08/2010 issue. It’s the cover blouse and Bryan remarked that it looked like me so what could I do?

082010120

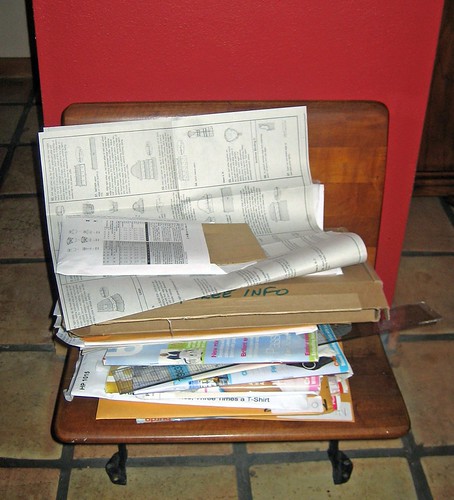
In light of the recent loss of an important piece of a TNT pattern, I’ve decided to get more organized. I mean, I am organized but I do tend to let patterns pile up a bit before I put them away. I needed some way keep everything together but out of my way. Yesterday, I was at my friend’s shop and he asked if I wanted these old literature racks because he was tossing them. Perfect! I hung one on the door of Sewing Room #1 to hold patterns that need to be filed away,

rack1

and the other hangs on the wall of Sewing Room #2 to hold patterns that I’m currently working on or are in the queue. This isn’t the best location because of the light switch but it was the best available. If it doesn’t work out, I’ll hang it on the door. Hopefully, this will at least keep everything together and keep my counters clear.

rack2

8/26/10 ETA: I didn’t mention that I copied Ann’s construction method. If you click on the link to Ann’s blog you can check it out. Basically, you are making two separate shirts and then stitching the sleeve to both at the same time. Ann’s tee is attached at the hem (she made the twisted version) and the armscye. Mine is attached at the armscye only.

31 Comments

Filed under Burda WOF, Sewing Studio

Tidying up

Lately it seems as if every available horizontal surface in both rooms is piled with sewing “stuff” (the cutting tables being the worst). I need to get some sewing done and was at the point where I could not think or be productive with so much clutter around me.

All of you know that I am a fabric “collector”. I admit it and embrace it! But, eventually, everything has to be put away and there was no way it was going to fit in the fabric closet. Jess’ old closet to the rescue! I already had fabric hanging in one side and have my Merrow on the other side so I figured I might as well make it a full-fledged knits-only closet. A quick trip to Home Depot and $40 later I had two long shelves and the hardware necessary to give myself a lot more storage. It took me less than an hour to cut and install the shelves (the top and bottom shelves were already there). Do yourself a favor and have one of those nice people at Home Depot cut them for you. It was not so easy cutting them myself with the bolt cutters. I guess I could have had Bryan do it for me but I wanted it done right then and there – you know how it is.

closet1

Yesterday morning I put everything away, just folded for now. The closet still needs to be painted which will wait until after the holidays. Then I will measure and roll everything. The fabrics on hangers are wovens that need to go in the other closet but they haven’t been logged in yet. I suspect that’ll wait until guests are coming and I need to make room for their clothes!

closet2

I know it doesn’t look like a lot of storage but, check it out, these shelves are 83″ long!

closet3

19 Comments

Filed under Fabric, Sewing Studio

Sewing Room Organization – Part I

Brad expressed an interest in the pattern and fabric binders I mentioned in my last post so I thought I’d share them with you. Of course, this is not the only way to keep a large collection organized but I have found it is the best way for me. Initially, it took me one weekend to catalog the fabric and a day to do the patterns. Additionally, this system requires minimal effort to maintain and is very cost-effective. Here is my entire fabric, pattern and Burda WOF collection:

binders

Yesterday morning – as I was trying to plan my next project – the growing mounds of patterns finally got to me. I’m usually pretty good about keeping things under control but I’ve been buying a lot of patterns lately and allowing them to pile up in Sewing Room #1,

sr1

Sewing Room #2 and

sr2

the dining room (I won’t show you my nightstand as Saturday is the one day I don’t make my bed!).

diningroommess

Since I had already planned to watch my honey’s game on ESPN at noon I decided that it was as good a time as any to file patterns. The sewing room gets cleaned up and I score major Girlfriend Points at the same time!

To get started, you’ll need 9×12 manila envelopes, sheet protectors and 4″ binders. I buy the least expensive envelopes and sheet protectors but it’s worth it to buy good-quality D-ring binders (at least for the pattern envelopes) because they, unlike their inexpensive counterparts, will last forever.

I remove the pattern and instructions from the envelope and place them in a manila envelope. On the upper left corner I write the first letter of the company (Burda is Bu and Kwik-Sew is KS) and the pattern number. The manila envelopes are then filed numerically. Patterns that have names instead of numbers are filed alphabetically in the first drawer. You can see that some envelopes have white labels on them – those have been reused. Believe it or not, I do occasionally purge my patterns!

filedrawer

The envelopes are then placed in sheet protectors and filed by pattern type (top, bottom, dress, etc.) in binders.

sheetprotectors

Since Hot Patterns are much thicker/bulkier, I make a photocopy of the front (or, more often than not, just print it out from the HP website) for my binder and then file the entire pattern in a separate file drawer.

hotpatterns

I used to keep my vintage patterns separate but I have found that it’s easier to keep everything together. I do have some collectible vintage patterns (like my Lucy and Desi patterns) that I just enjoy owning – those I do keep separate in acid-free plastic envelopes.

Catalogueing my fabric is just as easy. I made up these forms on my computer and had a bunch of copies made at Office Depot. As I buy fabric I just snip a piece off and glue it onto the sheet and note the source, yardage, width and fiber content. Rarely, I’ll put something away without washing. If that’s the case, I note that as well to avoid any nasty surprises later. And, since I now have multiple fabric closets I also note where the fabric is stored. Fabrics are organized by type: blouseweights, midweights, suitings, denims, cottons, knits, etc. As fabrics are used, I remove the swatch and cross out the description.

fabricswatches

As many of you know, my fabric closets are organized by color so it’s very easy for me to lay my hands on a particular piece. That’s it, my not very elaborate organizational system! What I really love about doing it this way is that I’m able to relax on the couch or in bed with my entire fabric and pattern collection. It’s nice to be able to see what I have without making a mess of my sewing room!

rolledfabric

I finished tidying things up just in time for mail call and, you guessed it, more patterns! My new HPs arrived along with a few new dress patterns. The drawstring pant pattern is already laid out on my cutting table, ready for tracing. I also managed to cut out another Sweetheart Top and will finish that up today.

newhps

Did you all notice the title? Part I. I thought it might be fun to do a series because I know I’m not the only sewer who has a lot of stuff to keep track of.

32 Comments

Filed under Fabric, Hot Patterns, Patterns, Sewing Studio

Tada! The new sewing studio!

Well, I have a few paint touch ups and have to rehang the manilla paper on another wall since I changed my mind about the layout but here it is! I know there’s a lot going on in all the pictures but, what can I say?, I have a lot of stuff.

Here is the view from the door:

fromdoor

The two machines on the right side are my Singer 20U (zigzag) and my Consew 206RB (a walking foot machine). I had the two plain stands leftover from my embroidery shop – they were used as work tables and for hooping. Since I often work on really large projects on these two machines I put a plain stand behind each one to hold all the extra fabric. I really could have used this when I made the cover for my pool table!

rside

On the left are my two coverstitch machines, back to back. I know I would have had more space in the center of the room had I put them against the wall but there is a method to my madness! Now that I live alone I wanted to be able to pull the attic ladder down without having to move any machines by myself – the coverstitch machines are especially heavy! I still have plenty of space to move around the cutting tables. Speaking of which, these are the cheapos you can purchase at JoAnn’s. I originally wanted the much more expensive Horn tables with the drawer but I’ve had these for a number of years and they are great! Of course, with the money you save you must buy the matching rotary mat.

lside

I won’t be doing any construction pressing in this room (I have a Naomoto gravity feed in my other sewing room) but I’m thrilled to have the space to keep the ironing board up! I usually turn on the iron and press things as they come out of the dryer. Now I won’t have to set up in the kitchen!

Straight ahead is my 12-needle embroidery machine. I have pretty much decided to sell it as I don’t see myself using it all that much. After 10 years in business, the bloom is off the embroidered rose.

From the other side:

back1

back2

back3

The Merrow machine sits in the corner to the left of the window since it’s not used very often. My manila paper roll will hang on the wall above it. That wall is concrete so I need to get the proper anchors before I can take care of that. To the right is the Jiffy steamer and on the table is the heat press (that’s the water heater enclosure next to it). Everyone is surprised that I didn’t sell the press when I closed my business. Are they nuts? With a 16×20 surface area I can fuse interfacing quickly and easily! Those paper dispensers on the hot water cabinet used to hold embroidery stabilizer, now they hold examining table paper.

Oh, and I just love my new floor! It’s epoxy garage floor paint and I sprinkled colored paint chips onto it while it was wet. The chips really help hide any imperfections and it was so easy! Since I couldn’t move everything out of the room I had to paint in two sections so the entire thing took nearly 10 days before I could move the machines back in. I had to let the concrete patch and then the bonding primer dry completely before I could even begin painting. The bonding primer drove me crazy because it stays tacky after it’s dry and my shoes kept sticking to it. I ended up wearing old socks instead which worked great.

The paint then requires 72 hours dry time before furniture can be moved back in. Of course, that is when The Boyfriend mentioned that the walls would look really nice painted a light tan (they were cold, stark white and looking a little dingy)… That set me back a few more days but it was so worth it! It drove me nuts to have my living room and bedroom piled with machines and stuff but now that it’s done it looks great! I can’t wait to get back to sewing. Unfortunately, I’m having oral surgery tomorrow and then going away for the weekend (provided I don’t swell up like a chipmunk!) so I’ll have to sit tight for a few more days.

33 Comments

Filed under Sewing Machines, Sewing Studio, This and that

DIY Paper Dispenser

After two years I thought it was finally time to get my roll of manilla pattern paper out of it’s box on the floor and into a dispenser. I looked online and the least expensive single-roll wall-mounted dispenser I could find was around $100, the most expensive around $200. Thrift is certainly not one of my strong suits but I had a problem paying that kind of money for something to hold a roll of paper.

On Sunday, I headed to Home Depot with the hope that I would find something that I could repurpose. My original thought was a pair of curtain rod brackets with a metal plumbing pipe but they were not deep enough for the roll of paper. Then I found the perfect thing: closet brackets designed to hold a rod and shelf! The metal closet rod was available in 4′, 6′ and 8′ lengths. Since my paper is 48″ wide, my boyfriend cut the 6′ rod down to 5′ for me – it is perfect! Although the brackets are rated for 125 pounds (my paper roll weighs 67 lbs) I opted to double them up and tie-wrap them together for extra stability. The brackets on the right are attached to a stud. On the left I used four 75lb EZ-Anchors.

paper1

paper2

Supplies needed:

* 6′ Rod $9.79
* 4 Brackets $13.16
* End caps $1.79

Grand total: $24.74. And it looks nice! Now I am getting ready to paint my garage floor with epoxy paint, ugh. I was going to lay a nice floor down but now that my son is buying a house and moving out next month (!) I’m thinking I’ll probably sell as soon as the market improves and don’t want to invest in anything expensive. While I certainly can fill up a 4/3 house with sewing stuff, the maintenance is just too much for one person. I’d rather spend my free time sewing! Let’s hope I can find a large enough town- or patio home to house all of my sewing equipment…

14 Comments

Filed under Sewing Studio, This and that

Where the action is

Some of you have never seen my sewing room and here it is. I know I’m not the only sewer who enjoys looking at everyone’s sewing spaces – or am I? The bones of this room have been about the same for ten years but it received a facelift last year in the way of new paint, new hardware, a new floor and wonderful water hyacinth baskets for organizing. It’s so nice not to lose pins in carpeting!

Here’s the view from the door. That wonderful little Bernette 334DS serger you see in the foreground has been sold since I took these pictures. I was feeling guilty that such a great machine had been sitting idle since the day I bought my industrial serger. I firmly believe that machines need to be used and loved.

The shelves above the industrial serger didn’t always hang so high. I moved them up in order to fit my industrial embroidery machine underneath back in 1999. That machine is now housed in my converted garage with my 6-head and the rest of my industrials. Just a quick walk to the other side of the house. I never bothered to lower the shelves back down. It doesn’t bother me and gives me more room for my thread racks.

Here’s the view to the right – pressing surface, small cutting area (which is usually just piled with fabric) and my Horn thread cabinet. I sure wish the thread cabinet had only deep drawers so that I could fit all of my serger thread in it. I have way too much regular sewing thread to fit so those shallow drawers on top are kind of useless. They hold tools and my knitting needles (I’ve been learning to knit for several years but haven’t progressed past garter stitch).

Here’s a little peek into my shop. The 6-head embroidery machine takes center stage, of course. She’s about 13 feet long. We actually built the room around her. We layed the carpet, painted, had air conditioning installed and then brought the machine in with a forklift (well, WE didn’t, the rigging company did it) and had the fourth wall put up. I usually stay out of here on the weekends – I have to go “home” sometime – but I am swamped with work so the machines are running as I sit here and type.

Okay, I’ve shown you mine – now show me yours!

10 Comments

Filed under Embroidery Shop, Sewing Studio

My fabric stash!

I recently took down my http://www.gigisews.com website – I just have too much going on and hadn’t been maintaining it anway so….. However, several people have asked about the picture of my fabric closet so I thought I’d put one up today.

A couple of years ago, Leslie in Austin mentioned that she had rolled all of the fabric in her stash. I thought this was such a great idea that I spent an entire weekend reorganizing and rolling all of my fabric. Rolling makes it easy to see every piece of fabric and to remove a piece without causing an avalanche. Because you can stack the rolls higher than flatfolds, I was able to fit all of the extra fabric from the linen closet into my sewing room closet as well.

As you can see, I try to keep my fabric separated by color. This makes it much easier to find what I’m looking for.

The wire baskets in the center hold linings, ribbings, lingerie fabrics and stretch linings. Like any good sewer, I have a few fabrics still in bags on the floor. 🙂

5 Comments

Filed under Fabric, Sewing Studio