I am so happy that I was able to finish the hem of my skirt last night.I have determined that I have no suitable shoes – really! – so I will need to take some time to shop and didn’t want to be stressed out that my skirt wasn’t finished. Have you shopped for shoes lately? Oh my gosh, so many ugly shoes out there! I just want a pair of strappy sandals in black or nude with a stiletto heel. Is that too much to ask?
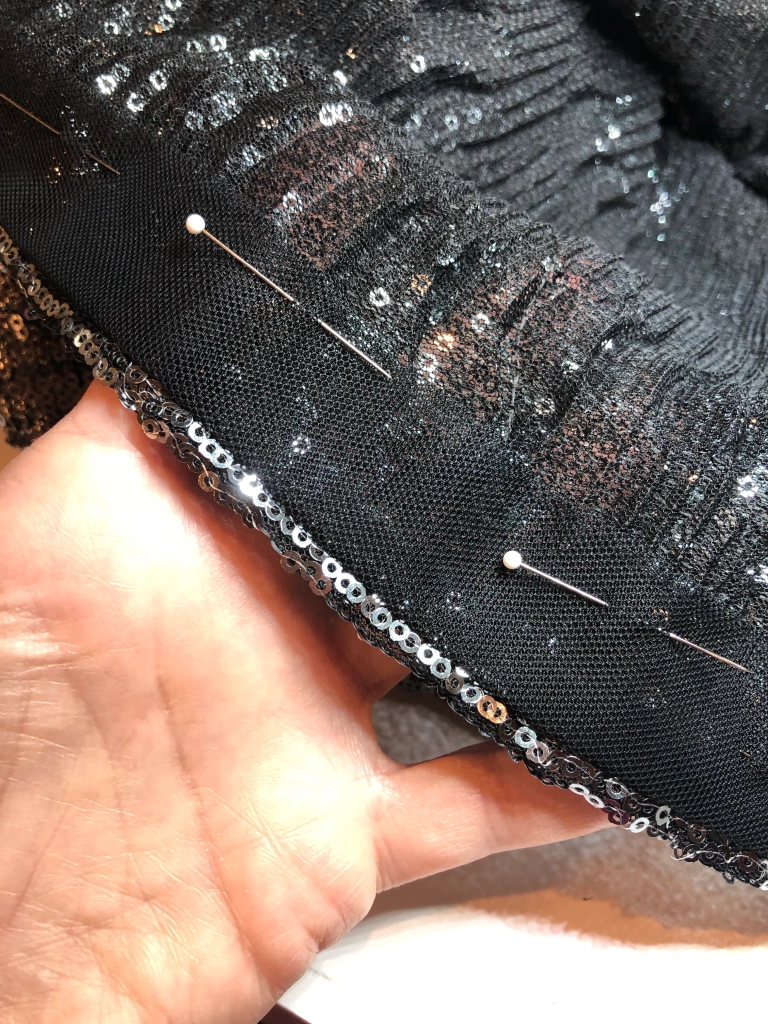
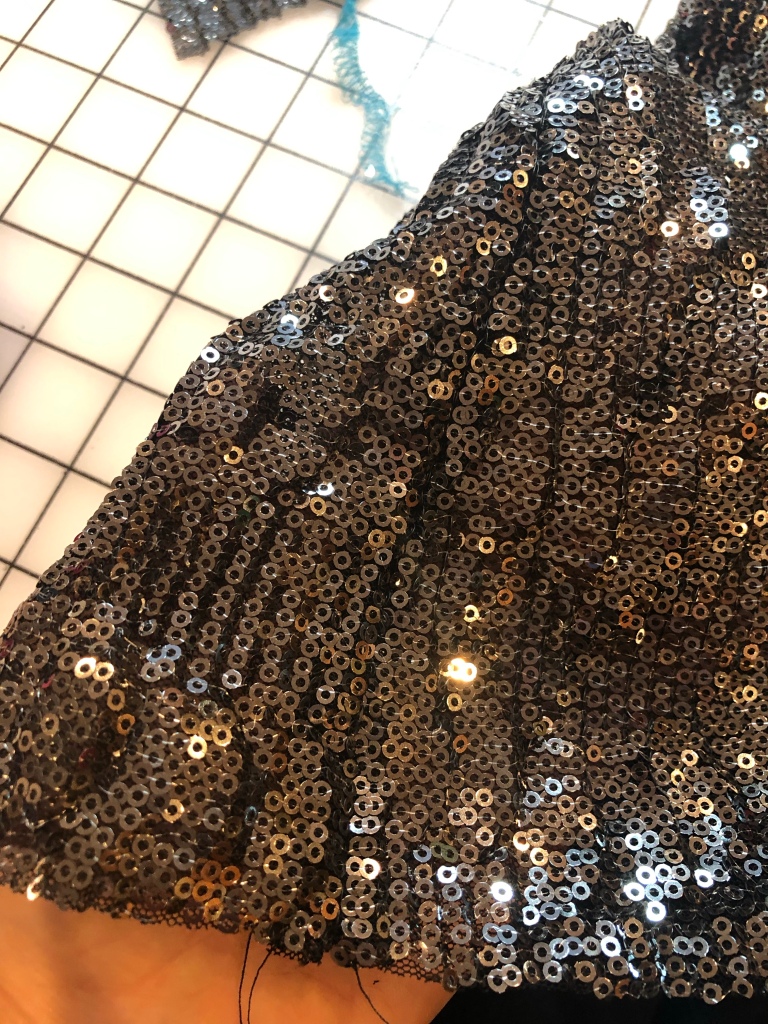
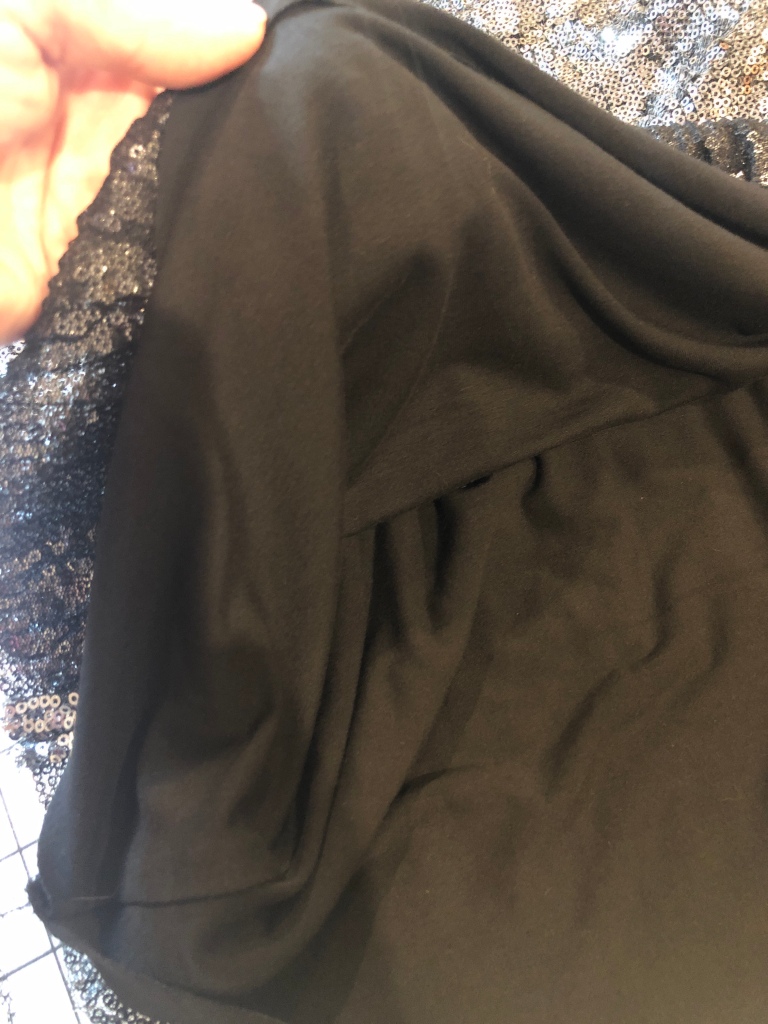
Anyway, back to the skirt. Since sequins are so scratchy, I faced the hem with a double layer of black mesh from the stash. I about went blind hemming this because I COULD NOT SEE! Even with my magnifying lamp, I was blinded by the sequins. Luckily, my hand stitches just disappeared into the fabric, hiding what I am sure must be quite a few uneven stitches.
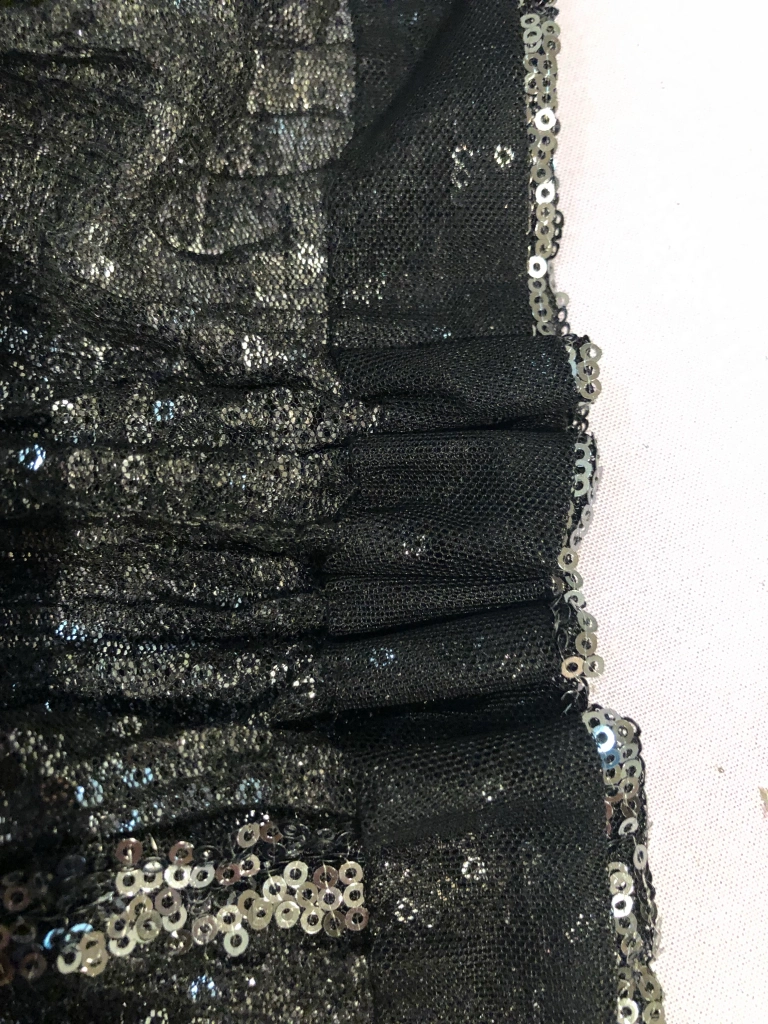
Once i finished sewing the hem, I crumpled it up and gave it a good steam to blend it back into the rest of the pleated fabric. I worked in 4-5 inch sections but it went very quickly thanks to the vacuum feature on my Laurastar.
Scrunched up as tight as I could get it without burning my fingers.Opened up after steaming.
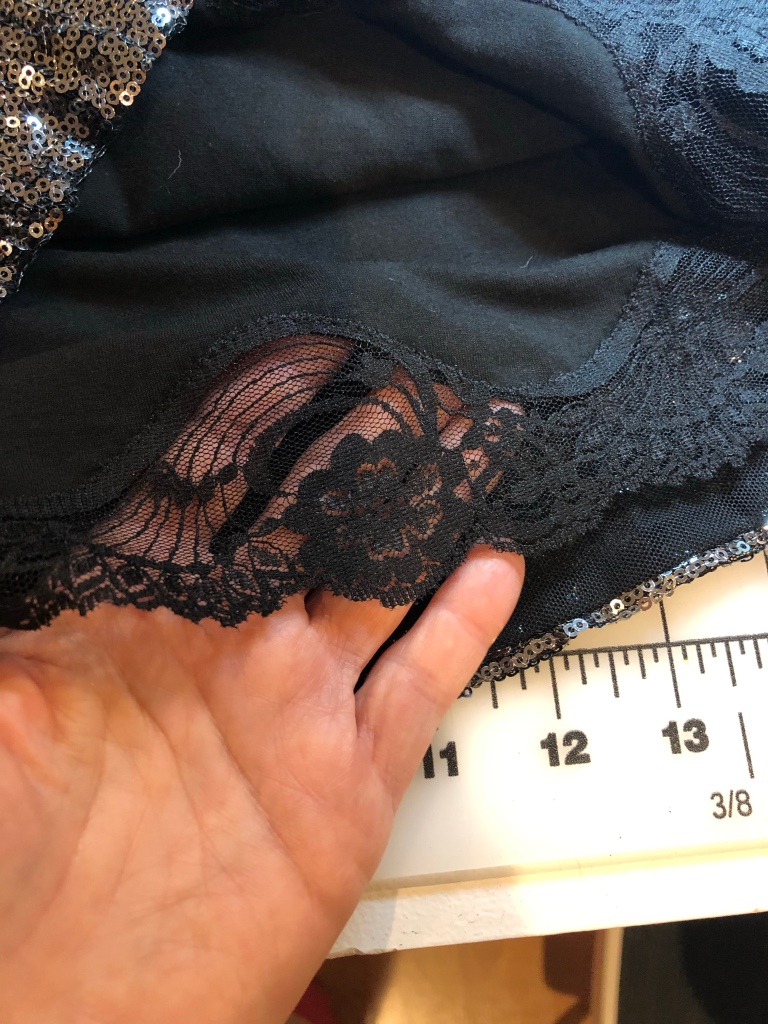
I used lace to finish my lining. A cheap, ugly lace. I don’t know where it came from or why it is in my stash but it will do for now. I have already ordered a beautiful eyelash lace that is slightly wider so I can redo the hem after the wedding.
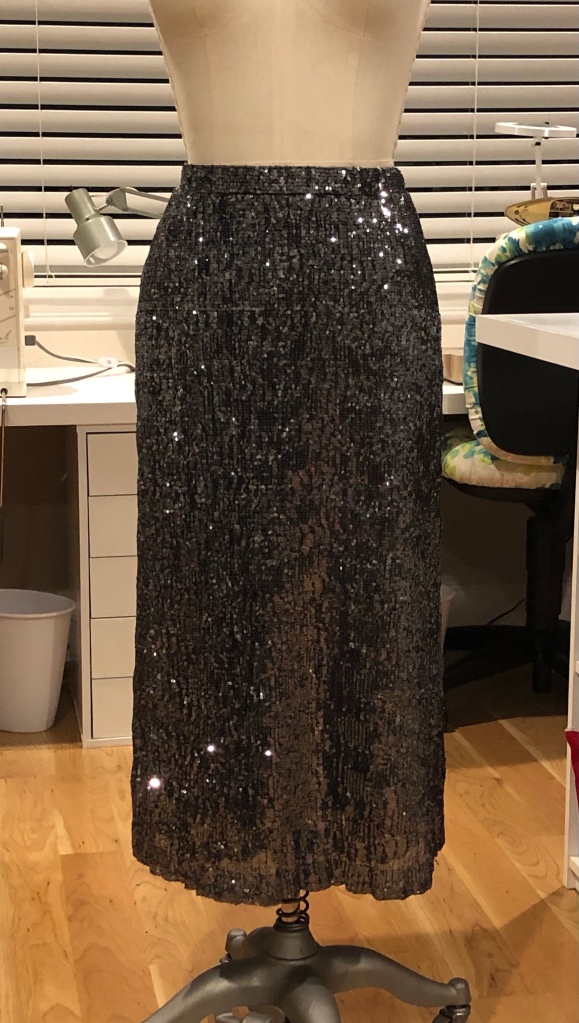
So here she is all finished. I am so pleased with the result! She is not hanging well on Irma as Irma has a nice, tiny waist and doesn’t have a high hip like I do. I really should pad her out but I really don’t use her for fitting so I haven’t bothered.
Before I put this pattern away, I have pulled another fabric that is just perfect for it and will whip up another skirt on Sunday. Stay tuned and thank you for visiting!
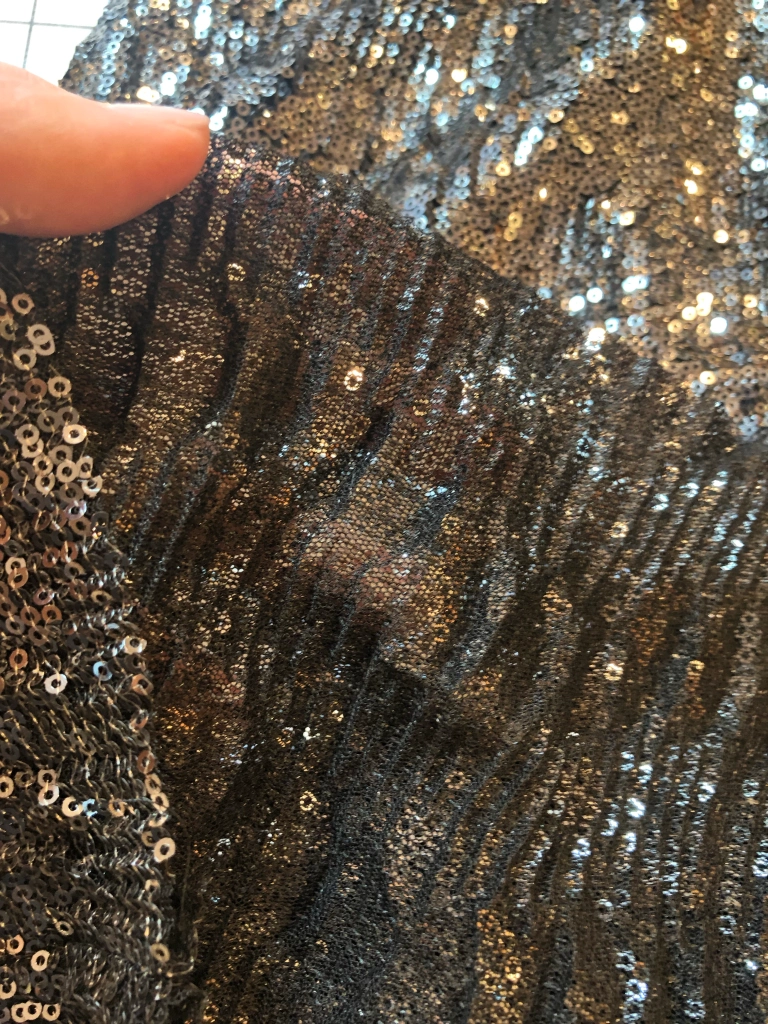
Next weekend, we are attending my close friend’s son’s wedding in a local botanical garden. It could end up being chilly that evening so I was at a loss as to what to wear. I decided on a sequined skirt that could be worn either with an off-shoulder sweater or with a silk blouse.
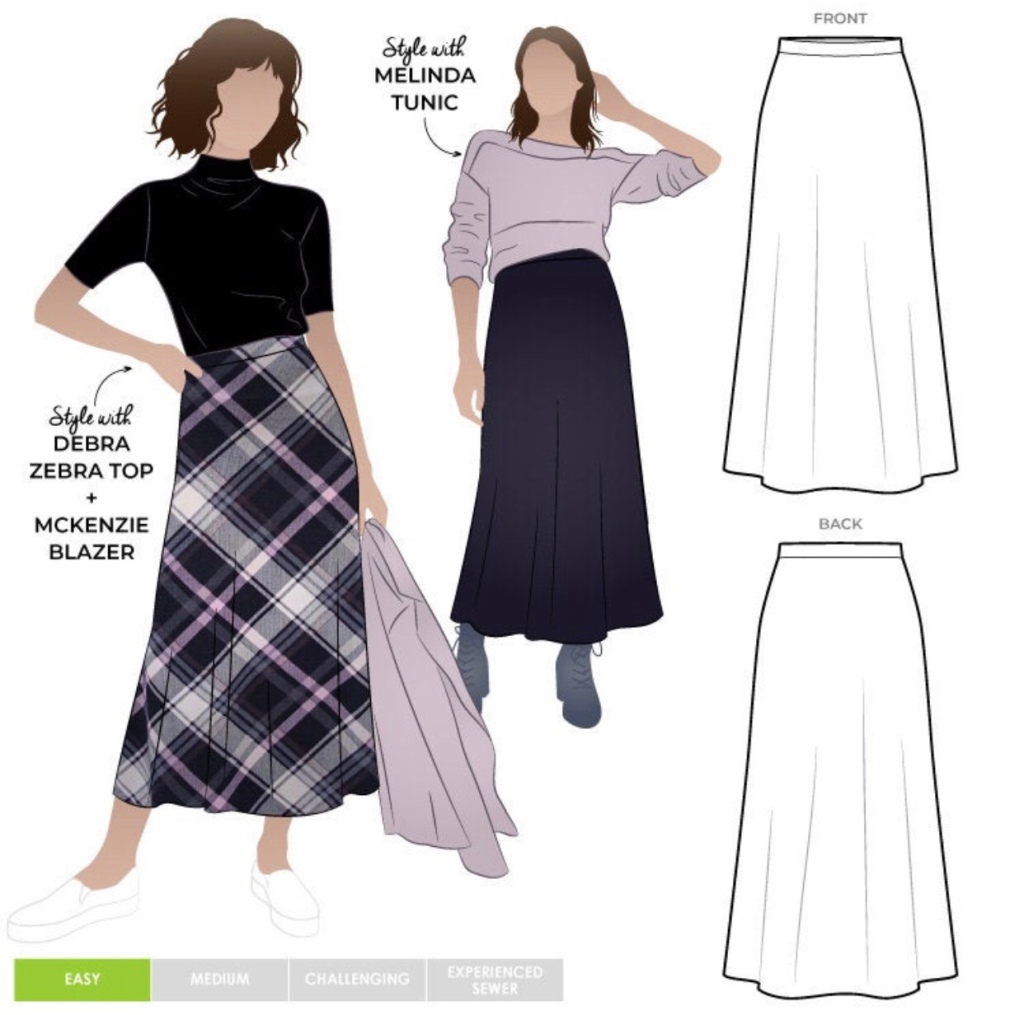
I love glitter so I had a few sequined fabrics in my stash. I decided on this one – tiny silver sequins on a pleated tulle backing. The fabric has a bit of stretch due to the pleating so I made my life extra easy and chose the Northcote Skirt from StyleArc.
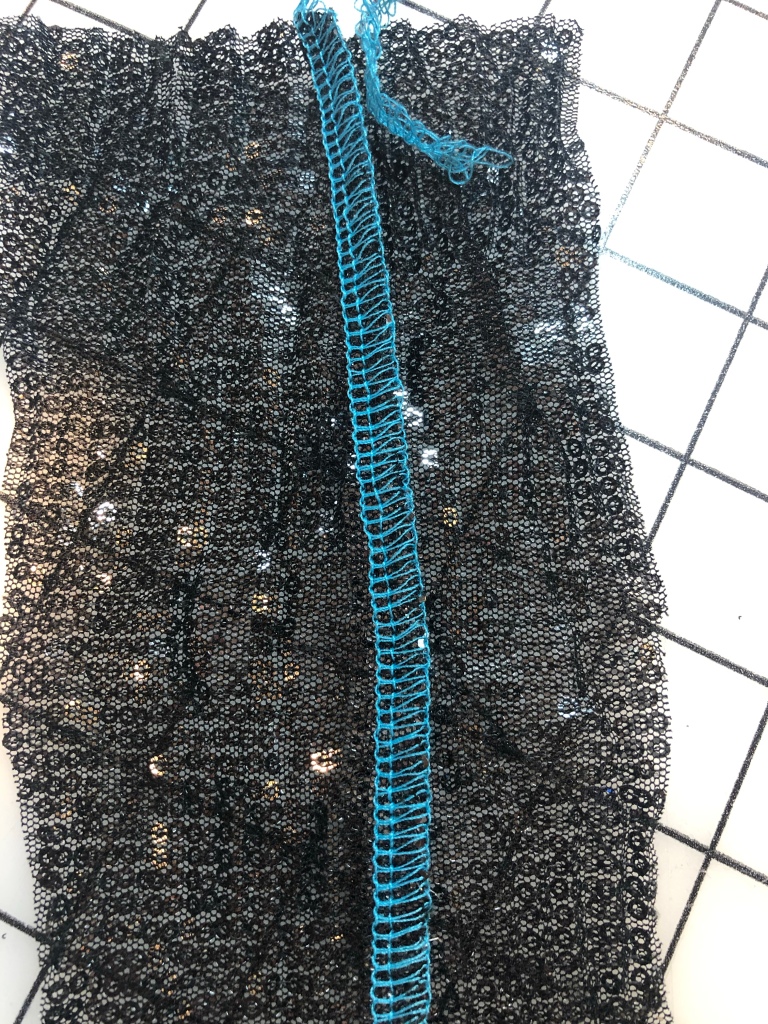
Stitching was, um, interesting. It serged well until I broke a needle. Then I broke a needle on my sewing machine and I thought I’d have to remove these tiny sequins from the seam allowances, ugh.
My last hope was a jeans needle and sewing very slowly and that did the trick! I did hit a couple of sequins but didn’t break a needle since I was sewing so slowly and was able to move the needle slightly and continue. I’m happy with the way this turned out.
I lined the skirt with a thin rayon jersey from my stash which will feel nice against my skin.
I am hanging the skirt overnight to allow the rayon jersey to stretch. Tomorrow, I will add a waistband and sew the hem.
Yeah, I know, I’ve been absent. I honestly have no idea where the time has gone. Work has been extra busy and there has been little time for much else!
Anyway, a few months ago, we decided to play musical rooms here. B really wanted to take over the garage to avoid having to store Christmas stuff in the attic – going up there becomes more of a chore every year. I had just given up my exercise room for a much-needed proper office since I have been working partially from home for the past year and a half. So, how to make this work? How to merge two sewing spaces (2-car garage and a 14×14 bedroom) into one? My brilliant idea was to move B’s Man Cave to my office, move my office into my small sewing space and then combine the two sewing spaces into the old Man Cave. To make this work he had to give up a significant amount of space and I had to give up a significant amount of sewing stuff.
Moving my sewing rooms has taken months of daily work but I am thrilled with the end result. The purging was really hard and I still have an industrial machine to sell but I feel like I have gained so much. I’m right off the kitchen, have tons of light and have everything but my fabrics and books at my fingertips. It’s nice to sew a few seams while I’m cooking dinner or doing laundry! This should do wonders for my productivity.
Without further ado, let’s start the tour! Feel free to leave suggestions on how I can make better use of the space. I’m always open to new ideas!
Main sewing corner with two of my Berninas. It’s nice having a big TV! Singer Rocketeer that I use as my buttonhole machine. The sturdy plywood counters were salvaged from my old sewing room and cut to fit the new space. They are not perfect – I have a few little cosmetic fixes to take care of – but they are far superior to any particle board counters that I could have purchased new. Presses, specialty threads, zippers, rulers and some of my patternsSerger and heat press on top of my pattern cabinet. Slat wall holds threads, scissors and baskets with miscellaneous supplies Cutting table. The wood cabinets were already here and are super handyView from the other side. My walking foot machine sits to the right of the cutting table with my blind stitch. I don’t use either all that often so it works.My industrials. This was a bit like a puzzle getting everything to fit but it works well. The most used machine (Consew with the right-angle binder) is easiest to access but I have adequate space to use the other machines when i need to. I’ve already used the cover stitch three times and felt perfectly comfortable.Cone thread on the wall and more slat wall holds longer rulers. I love slat wall because it’s so easy to change up as your needs change. I’m considering selling my Jiffy steamer but, for now, it’s out of the way. A 5-gallon bucket in the bathroom holds rolls of pattern paper and a spare cutting mat.I did lose my large pressing area but I am doing perfectly fine with my Laurastar. If I need a larger pressing surface, I can put my big pressing board on top of the cutting table and wheel the boiler iron over.Of course I made space for my supervisors, my childhood stuffed animals.
I am never satisfied with the amount of light I have for sewing. My newest sewing machine is a 1997 Bernina and, with the exception of a few industrials, all of my other machines are quite a bit older. Lighting on vintage machines pales compared to that of 21st century machines.
On Saturday, I saw an advertisement for quite pricey ($45 and up) LED light strips for sewing machines. Knowing that LED light strips are generally very inexpensive, I hopped over to Amazon and found very similar light strips for under $8.
They arrived today and I am just so excited about them! They are self-adhesive and dim-able (not sure why you’d want that…) and easily cut to fit. I ordered one for my Bernina 1530 and one for my 500A buttonhole machine. Wow, what a difference!
I’m generally not a fan of sticking things onto my machines but I’m less of a fan of sewing in the dark. Once I turn on my LED light to the left of the machine, I will be able to see so clearly!
Here’s the link for the strips that I ordered. At this price, you can buy one for every machine!
It’s been another busy week and I am still not sleeping. Consequently, I haven’t done much sewing until this weekend.
The zipper has been installed and the fronts and back have been joined.
I took the side seams in 1/4” and may take them in a bit more. This style has a lot of ease which can easily overwhelm me.
I am also toying with the idea of adding some random beading. This bead collection called ‘Natalie’s Mix’ from Alabama Channin goes very well with the colors of my jacket.
However, after making a small sample, I have decided that I really only like the bronze colored beads and maybe the occasional dark sequin. The light sequins and beads jump off the fabric and make it look too busy. What do you think?
I finally just took a deep breath and cut and I’m really happy with it so far. The back really *had* to be cut this way as I couldn’t imagine it cut any other way. (Sorry for the wonky photo – panoramic while standing tippy toe on a stool!)
Ordinarily, when I want to match a pattern across a center front I use the CF line as my guide. But the front of this jacket veers off-grain in the upper chest plus I’m using a zipper so there is no overlap. So, instead I cut one front, lining up the lower CF line with the center of the medallion, and then laid it face down on the fabric, matching the pattern, and cut my second front. It looks weird now but once the zipper is installed it will look better, I hope.
I chose a cotton batiste as the underlining for the body of the jacket. I love using an underlining because I can make very clear markings without worrying about show-through.
Before I hand basted the layers together, I fused a small piece of interfacing where my welt pockets will be. My fabric ravels pretty easily so I wanted that extra reinforcement. Again, I pinked the edges to avoid a hard line showing on the right side.
I also stabilized the bias edges with strips of fusible interfacing. If your fabric doesn’t want to be fused you can always fuse to your underlining – another bonus to using an underlining.
The last step before my favorite part – the welt pockets – basting the layers together. I use either silk or cotton basting thread but I definitely enjoy using the silk thread more as it glides through the layers so easily. I couldn’t locate my basting needles (hence the tiny stitches) so I just used a #9 hand needle and basted within the seam allowances. I really recommend basting needles as they are longer and make fast work of this somewhat tedious job.
Comments Off on Burda Style 09/2016 #115 Bomber Jacket – Part II
Over the years, I have accumulated quite a collection of fabrics, patterns, buttons and other ingredients. I recently cleaned out my fabric and pattern stashes and thought it was high time to go through my huge zipper collection. FYI, those are mostly 2 gallon ziplocs. 🤦♀️
Ever since I started using really nice zippers – Riri, Lampo, Excella – I’ve become dissatisfied with anything less. It’s just so easy to order what I need or stock up on my annual trip to NYC. I plant Bryan at Ben’s and head over to Pacific and Botani with my fabric swatches and buy what I think I’ll need for the coming year. If only he knew how much money was invested in those little shopping bags. 😳 I mean, the Riri room at Pacific is like a candy store for me, I want them all!
Since I’m in a purging mood, I decided that today was the day to tackle the zipper stash. Once I got going, it was pretty easy. Now, the stash consists only of zippers that I will actually use!
And the purge pile. Nothing wrong with any of them, but I know I will never use them so better to pass them on to someone who will!
Now on to the fun part – assembling the fronts and installing the welt pockets.
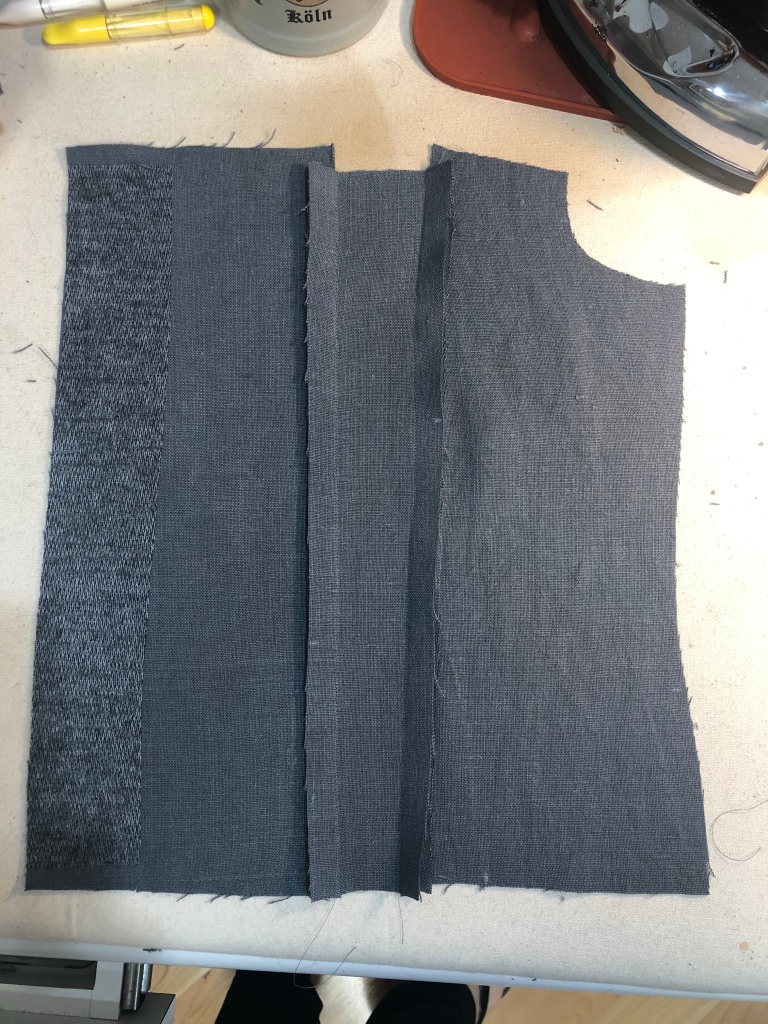
First, I joined the three front panels in a standard 5/8” seam and pressed the seams open and then away from the center panel.
Next, I trimmed the under seam down to a scant 1/4” and then folded the top seam allowance over it and edge stitched to make a mock flat felled seam – less bulky in this heavy fabric than a traditional flat felled seam. I have also bound these seam allowances in really heavy fabrics like velveteen.
Next, the pocket facing is applied. To reduce bulk, I used a firmly woven cotton. I generally use Symphony broadcloth but I wasn’t able to find the right color. I serged around three sides but it’s only necessary to finish the bottom edge because the sides will be finished off by the pocket anyway. Stitch, trim, clip into the corners, turn and edge stitch.
The pocket edges are turned under 3/8 and then applied to the wrong side of the garment and topstitched into place.
I need to make buttonholes in the pocket flaps yet but you get the idea.
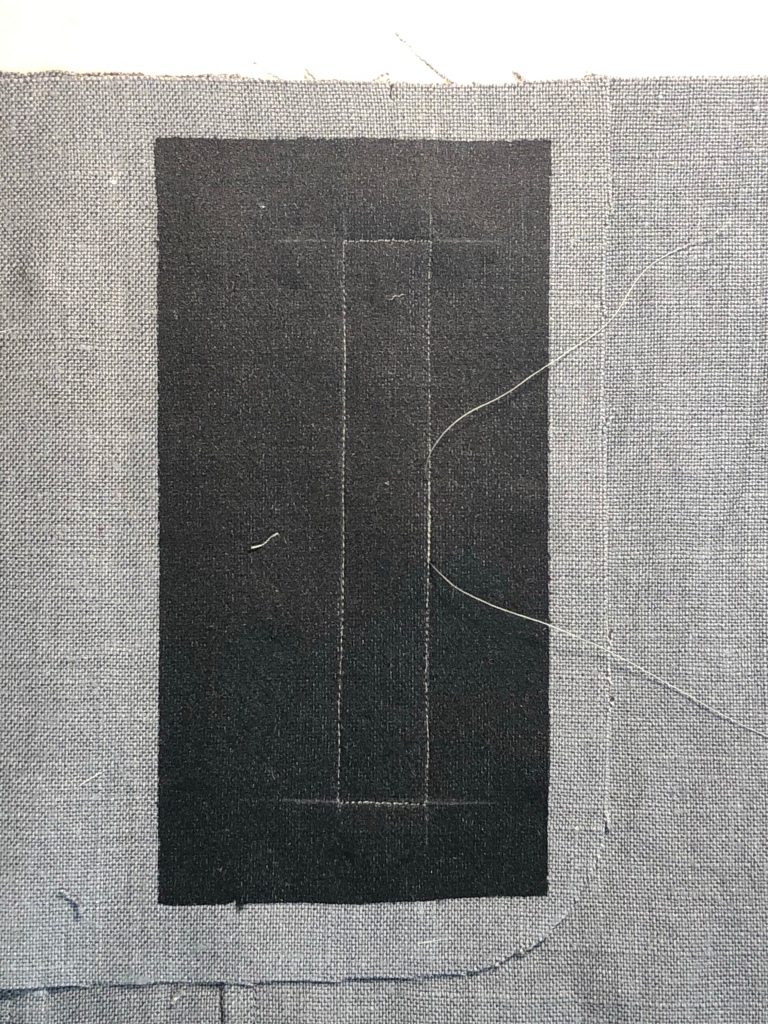
Now, onto the welt pockets. First, lay you pocket piece face up onto the right side of the garment. I like to clearly mark my stitching lines with a chalk pencil.
I have also added a piece of very lightweight fusible interfacing to the wrong side of the jacket front. I like to do this anytime I add a welt pocket. I’ve pinked the edges to prevent any show-through on the right side.
Then I stitch around the box, using a stitch length of 2 on the long sides, with smaller stitches around the corners. It’s a good idea to begin your stitching on one of the long sides to avoid thread buildup in one of the corners.
Then, cut down the center of the box and into the corners. Turn to the inside of the front and press.
If your corners are not perfect, it’s okay because this pocket will have a bartack across the top and bottom of the welt which will hide any imperfections. If you are scared of welt pockets, this one is for you.
Next, fold back the straight edge of the pocket back over the opening and press well. Turn it back again towards the front edge, forming your welt. Fold the garment back from the welt and secure those little triangles. I like to use a few lines of straight stitching here.
Tada!
Then I edgestitch around the top, bottom and front of the welt before laying the pocket lining – again, a firmly woven cotton – on top.
The lining is attached to the pocket with a straight stitch about 1/8” from the edge. No need to be super neat about it since it will be hidden underneath my binding or enclosed in a seam at the front and bottom. You can also just serge them together, if you wish. Now, it’s time for the bartacks. My stitches are very short as I like more of a satin stitch here but you can use a longer length if you prefer.
The finished product!
Next up, I’ll be setting up the binder and buttonhole machine. I’ll be interested to see how this metallic organza works out as a binding.
Parting shot. Cattlianthe Gigi Andrae Louis ‘Maverick’ HCC/AOS. My dear friend Thanh named this beautiful hybrid for me a few years ago and I so wanted to be the first to have it awarded. The orchid gods smiled on me a year ago and awarded this flower an HCC (Highly Commended Certificate). I gave it the clonal name ‘Maverick’ because, of the many blooms of this cross I have seen, it is the only one that is not a deep red.
The Simplicity jacket is all cut out and interfaced – ready to sew. I hope to get started on it this weekend. I probably won’t get much done because I do have to give my bedroom a good cleaning. It’s amazing how much dust manages to get through even with the doorway sealed off. I think that may be why I’ve been coughing so much all week.
We are down to the studs in most of the bathroom.
The WC still looks really bad. I guess the walls were yellow when I moved in 22 years ago. I had blocked that out forgotten.
My friend Tom is coming over this afternoon to help me with the niches in the shower. Right now I have this arched one and want to replace it with two rectangles for more storage. I’m sure the tile installer will appreciate not having to make all of those cuts. My friend Jim – who does high-end bathrooms in multi-million dollar homes – says my soap dish is very lame. I think he should come shopping with me.
The exterior plastering is done!
On the agenda for the weekend: buying new faucets, building niches and deciding on a tile layout. Oh, and a soap dish of some sort.