Monthly Archives: October 2010

Simplicity 2508 – Part I

First, thank you all so much for your wonderful (and plentiful!) comments about my HP Riviera Boulevard Jacket and my Isabel Marant jacket. I am so pleased with the way both of them turned out and can’t wait for cooler weather!

I’m already working on my next project, a new outerwear jacket. This is not something I’ll have a need for too often but I like to be prepared. I’ve chosen Simplicity 2508 and a pretty cotton herringbone velvet from Cynthia’s Fine Fabrics because it will go with just about anything. The vintage buttons (which are black IRL) are from my stash.

simplicity2508

buttons

After I finish this, I am going to start on a black lambskin jacket (Ann is picking up the riri zippers for me when she’s in NYC next month) and then (hopefully) get back to the Milly blouse. Still no luck finding the red chiffon so I will probably have to go with the taupe charmeuse instead. I’m disappointed but that’s the way it goes.

29 Comments

Filed under Simplicity, Year of the Jacket

Isabel Marant Jacket – Final

Once I got the pockets in, everything went so quickly! I felt like I was trudging along for awhile there and then, bam!, I was finished. The original jacket had that horrible, puckery, pouffy mess around the neckline (you can zoom in at Net-a-Porter to see what I mean) so I knew I’d have to come up with something else. I decided that a simple 5/32″ piping would be the best way to go and I’m pleased with the result. Actually, I’m pleased as punch with the entire jacket!

marantfront

marantside

When I got to the point of choosing a lining, I was going to go with plain old black and then I found this piece of crepe de chine in my lining stash. Realize that, by this time, I was so deep into this project that I could no longer see the forest for the trees and couldn’t decide if this was crazy good or just plain old crazy. So, I consulted with Ann and Phyllis and it was decided that, yes, it was crazy but we liked crazy.

lining

This is proof that, sometimes, you just have take risks (remember, it’s only fabric). Yes, it’s totally crazy and unexpected but I like it. Besides, a little Michelangelo is good for the soul.

liningfull

I modified the front facing to end at the raglan sleeve seam for a couple of reasons. First, I didn’t want a back neck facing and, second, metallic brocade is scratchy so I wanted as little of it as possible on the inside of the garment. I used plain black China silk to line the sleeves. I thought cutting up the lining fabric motifs for the sleeves would spoil the effect.

liningfront

51 Comments

Filed under Simplicity, Vintage Patterns, Year of the Jacket

Isabel Marant Jacket – Part I

Finally! I have had all the “ingredients” assembled for awhile so I was anxious to get started. In case you’ve forgotten, here is the inspiration jacket:

isabelmarant1

isabelmarant2

I used this vintage pattern, Simplicity 5440, as my starting point.

s5440

I love working with vintage patterns because you get details and drafting that you can’t find in most modern patterns. Check out this sleeve hem (and, remember, this is an elasticated, casual sleeve!):

sleevepattern

After tissue-fitting the pattern, I made my adjustment (sleeve length only) and cut the main pieces out in flannel. The original jacket is puffy (the description says quilted) so I wanted the same feeling without it being quilted. Back in the 1990s when we made tailored jackets out of blouseweight fabrics, I always used flannel as an underlining. It served two purposes: 1) it beefed up the fabric without making it stiff and 2) solved the (at the time) problem of successfully fusing to a silky fabric. This is just cheap flannel from JoAnn’s that I prewashed/dried several times. I have to say, I was looking for a thinner/cheaper flannel and this one is actually a pretty decent quality. Go figure.

flannel1

I used the flannel to work out my neckline changes as shown here:

flannel2

Then I used the flannel pieces as my pattern. This is actually a really good way to “test” a pattern before committing to your good fabric. I simply serged the flannel underlining to all of the brocade sections and then treated them as one layer for the remainder of the construction. The serging is necessary because brocade ravels every time you look at it funny.

First up, the single welt pockets. I always use this welt pocket pattern that I got from Judy Barlup when I attended a sit-and-sew class with her a number of years ago. It’s nice not having so much bulk at the sides. I drew the lines to help me center it on a motif.

weltpattern

Here’s what the welts look like once they are sewn:

weltssewn

and turned/pressed:

weltback

weltfront

I drew two lines 1/2″ apart on a piece of stiff non-woven sew-in interfacing and marked the ends of the welt. I basted this into position on the welt stitching line (the lower line). Make sure you go past the ends of the pocket, this makes positioning the welt from the right side easier.

welt1

Then, I positioned the welt on the right side of the garment and stitched on the same line (from the wrong side), this time being sure to stop at the ends of the welt.

welt2

Next, I laid the pocket pieces (plain old Symphony broadcloth) over the welt and,

welt3

stitched over the previous stitching again and stitched on the 2nd line, stopping my stitching about 1/2″ from the ends.

welts4

Now for the scary part: cutting into your jacket front, yikes! Using a very sharp pair of scissors, trim right into the corners, being careful not to cut the welt or the pocket bags. I use the fingers of my left hand to keep everything out of the way.

welt5

Turn everything to the inside, flip up your welt and you’re almost finished!

welt6

Here’s what the inside looks like. I trimmed away some of the excess interfacing and stitched down the little triangles (you can see them at the top of the pocket) before sewing the pocket closed. I made the bags larger than I thought I needed and trimmed them down once I attached the zipper.

welt7

The body of the jacket with the completed welts. Note that I decided not to make the chest pockets. I didn’t think they really added anything to the jacket so why bother?

completedwelts

16 Comments

Filed under Simplicity, Vintage Patterns, Year of the Jacket

HP Mighty Aphrodite Draped T-Shirt

Another clear winner from HP! I fell in love with this pattern the moment I saw it. I love the asymmetrical draping, sleeves and the drawstring and was so thrilled to finally get it traced off last weekend.

patternenvelope

I made the short-sleeved asymmetrical sleeve version in a gorgeous purple rayon/lycra from, where else? Gorgeous Fabrics. I made my usual HP size 6 but skipped the FBA since I figured the draping added enough ease through the bust (it did). The sewing was pretty uneventful and went quickly. I did have an oops! moment when I realized that I forgot to make a broad back adjustment but, thankfully, the top is wearable.

The only thing I will change next time (besides the back alteration) is to not interface the entire back neck facing. Even though I used a knit interfacing with plenty of stretch, it still interfered with the stretch of the fabric enough that I went back and removed it. Needless to say, I fuse for life so it took quite awhile to heat/peel/heat/peel but I got it done and am happier with the result.

You can see that, even though the neckline is modest, this top definitely has a vavavoom quality to it. The ruching and draping are very flattering so this pattern will definitely go into the “favorites” file.

Leftside

rightside

For my 2nd version, I used a super-soft heathered oatmeal rayon/lycra (again, from Gorgeous Fabrics). This time, I used two plain sleeves because the fabric had a much more casual feeling to it.

oatmealaphrodite

I fused only the neckline and shoulder seams of the back facing as shown here. This worked out much better for me.

backneckfacing

What’s next on the agenda? Well, I am still on the hunt for the right shade of red poly chiffon for my Milly blouse (I must get it done before the holidays!) so I’m working on my silver brocade baseball jacket since I’ve assembled all of the supplies for it.

31 Comments

Filed under Hot Patterns

HP Riviera Boulevard Cardigan Jacket

First, I have to say that I am so touched that you guys missed me! Believe me, I have missed you too! As some of you have speculated, I did not get a job, sigh. But, my sewing classes are going well so that makes me happy. I just love my students, they are so much fun that I look forward to class every week (as I hope they do!). Things have just been busy so I’ve been spending my precious spare time sewing rather than blogging.

I did finally finish my HP Riviera jacket and LOVE it! I’ve had this pattern since it first came out and am so mad at myself that I’m just now getting around to making it.

I used a yummy wool/lycra doubleknit that I bought from Nancy Erickson back in 2003. Oh, how I love working with wool! It practically sews itself. I did prewash this fabric by hand with Orvis (from the local feed store), air dried and then steamed thoroughly before cutting. I seriously doubt I’ll be hand washing this jacket but I could if I wanted to. The fab buttons came from Cynthia’s Fine Fabrics and I used Pro-Sheer Fusible interfacing from Fashion Sewing Supply.

riviera

The jacket goes together very easily and quickly. The first thing I did was to construct the pocket flaps. The horizontal flaps are constructed as you normally would. Because my fabric was thick and spongy, I did all of my topstitching at 3/8″ vs. 1/4″ (which looked skimpy and cheap).

horizontalflaps

The vertical pockets are sewn on two sides only. The top is left open because it will be caught in the yoke seam later.

verticalflap

flaps

Pocket construction is very simple. First, the vertical flaps are stitched to the fronts:

front1

Then, the pocket bags are stitched on top of the flaps,

fronts2

so you end up with this:

fronts3

The other pocket bags are stitched to the side front:

sidefront

then the front and side front are sewn together at the top and down the lower front. Any topstitching alongside the pocket flap should be done now, before the pocket bags are sewn shut.

front4

Here’s the finished pocket (before pressing):

front5

Here it is pressed and topstitched. As I mentioned before, the area in front of the flap is topstitched before the pocket bags are closed up. Once the pockets are stitched up, the topstitching below the flap is completed.

fronts7

The body of the jacket has been put together. Now it’s time for the collar!

jacketbody

I know some people have expressed confusion over the HP collar but it’s really very, very easy. You are instructed to sew to the dot but I found it better to just keep on going all the way. I have done it both ways but prefer this way. The seam allowances have been trimmed and graded in this photo – I forgot to take one before I did that but you can use your imaginations. Please notice that I am not a Chicken Clipper!

collar1

I then pressed all three seams open over my trusty point presser

collar2

and then turned right side out.

collar3

I staystitched just inside the dot on the jacket front and clipped to the corner. Then, simply match up the two dots and stitch your inside corner.

collar4

Voila! Very easy!

collar5

Here is the jacket with the facing partially attached. I always attach it in two steps to make my life easier.

facingattached

I did make one small change to the pattern and that is to add a hem allowance rather than using facings. Mainly, I did that because I really wanted to have a mitered sleeve vent. If I was going to have a hem at the sleeve it stood to reason that I should have one on the jacket body as well. I didn’t take any photos of the sleeve construction because I figured everyone already knows how to miter a sleeve vent – and this post is already so long-winded!

sleevevent

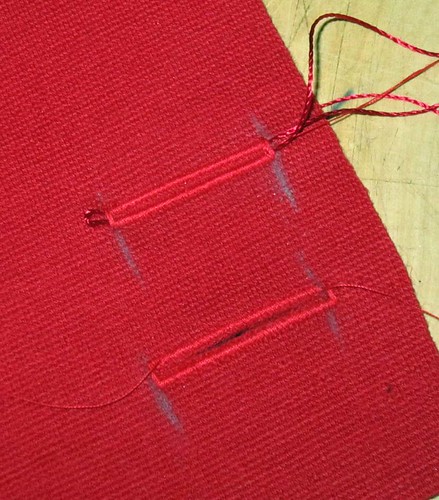
Because my fabric is pretty stretchy, I had problems making horizontal buttonholes. I finally achieved success by fusing a 2nd piece of interfacing with the stable grain on the horizontal and cording the buttonhole. I only had cordonnet in white and black but red Pearl Crown Rayon came to the rescue and worked just fine. (Excuse the blue chalk, this is my sample.)

buttonholes

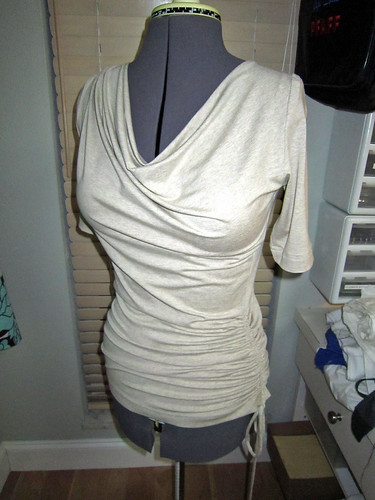
Wow, that was a very long post, wasn’t it? I’m sure it’s the longest I’ve ever done but that’s what I get for leaving it all until the end. I’m headed back to the sewing room to finish up my HP Mighty Aphrodite tee – I’ll write about that this weekend. Auf Wiedersehen!

10/16/10 ETA: I realized last night that I neglected to mention anything about sizing and fit – sorry! I sewed a straight size 6 (which I need through the shoulders) and needed no alterations except for my usual forward shoulder and a little extra width through the bicep (I blame you for that, Jackie Warner!). Shocking, but true.

57 Comments

Filed under Hot Patterns, Year of the Jacket