Category Archives: Couture Boot Camp

New Look 6454, The Couture Version – Part III

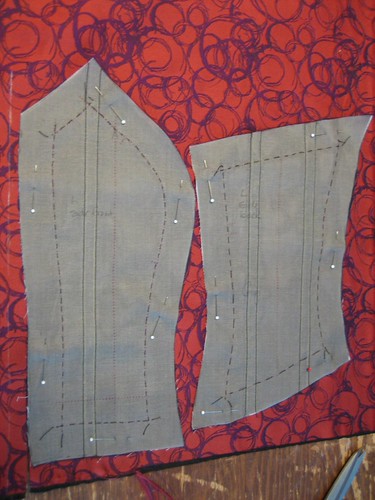
Once the bodice had been hand basted together and I had another fitting, I stitched the dress together by machine. Notice that I took a smidgen off the bust curve of the Princess seam.

stitching

All of the seams were then trimmed, well clipped, pressed and

bodice

catchstitched to the underlining.

catchstitching

The next step is to insert the zipper – yay, we are coming down the home stretch! I pinned and then hand basted the zipper opening and will now insert the zipper by hand. Notice that I included the silk crepe de chine lining in my pleats to give them additional fullness and support. The skirt is also underlined with muslin.

zipper1

zipper2

I hope to get back to this by the weekend. I have no a/c right now and the thought of standing over a hot iron isn’t very appealing!

Phyllis had asked about my underlining yesterday so I thought I’d go into that a little more. Since my dress has a waist seam (it’s actually slightly low waisted but that’s fine) I was able to sew the boning channels through the two underlining layers. Had I not had two layers I would have stitched separate channels to the underlining. The underlining/boning unit is then treated as one with the fashion fabric. My waist stay will exit the lining (through the use of buttonholes) a few inches from the zipper opening.

When working with a dress that doesn’t have a waistline seam, a separate corselette must be made (which will end at the waist). The corselette can simply be two layers of cotton which are stitched wrong sides together and then boning channels made through those layers. Once the dress and lining have been put together, the corselette is attached to the dress at the top edge only. The corselette has it’s own closure (I like hook/eye tape the best) and is tighter than the dress itself. Here are some photos I took of one of Susan Khalje’s dresses to illustrate:

corselettehooks

corseletteopen

Notice that the waist stay is incorporated into the corselette whereas mine will simply be hand-tacked to each bodice seam and is otherwise left loose.

22 Comments

Filed under Couture Boot Camp, New Look

New Look 6454, The Couture Version – Part II

Once all of my muslin underlining pieces were traced and cut in mirror image (so that the markings would end up next to the body) they were hand-basted to an additional underlining of silk organza. Having two layers of underlining meant I could stitch my boning channels through the layers rather than having to add separate boning channels.

bastedtoorganza

Here is my bodice all laid out in order. Looks gigantic, doesn’t it?

bodicelaidout

I then used these pieces to cut my fabric. I cut from the wrong side since my underlining pieces were in mirror image. The left and right side of my body are just a little different, something that is very noticeable in a very fitted garment. The narrow rows of parallel stitching are my boning channels.

cuttingfabric

Next, I removed each previous row of basting and hand-basted all three layers together on the stitching line.

bastetofabric

Notice that here on the center front panel, a fisheye dart was pinned out and marked. I did not stitch it in this dress but may use it on a future version.

frontboning

One of the highlights of the week was dinner with Cidell. Finally, after all these years we meet! Left to right are Gretchen, Anna, Susan, Robin, Barb, Me and Cidell (photo courtesy of A Little Sewing). Great fun!

dinner

15 Comments

Filed under Couture Boot Camp, New Look

New Look 6454 – The Couture Version, Part I

PI decided to make a very fitted strapless dress in Couture Boot Camp because a) that’s a tough thing to fit on yourself and b) I’d never done it before!

I selected New Look 6454 as my starting point because I liked the shape of the bodice.

newlook6454

Since I knew I was going to drape my own pleated skirt I only made a muslin of the bodice. I began with my usual size 8 and altered for a full bust on the front.

frontpatterns

On the back, I made a broad back adjustment and added a seam allowance at the center back for the zipper. I tend to prefer a CB zipper over a side zipper because it’s easier when you have to fit yourself (since no alterations are made at the CB).

backpatterns

At the muslin stage, the side front was split into two pieces and more material removed through the waist (the shaded area). Notice that all of the stitching lines and grainlines have been machine stitched onto the muslin. One inch seam allowances were added throughout. The parallel lines marked with a “B” are the boning channels.

muslinsidefront

After the final muslin fitting, I traced my muslin pattern onto a muslin underlining, again marking the seamlines/grainlines (with tracing paper only this time) and adding 1″ seam allowances. Note that, since my body is not symmetrical (whose is?) I traced the pieces in mirror image so that the markings would end up next to my body and be visible from the inside of the garment.

muslintracing

The fabric I am using is a lustrous Vera Wang brocade from A Fabric Place (Michael’s Fabrics for you internet shoppers). Isn’t it gorgeous?

verawangbrocade

13 Comments

Filed under Couture Boot Camp, New Look